
 - Part 1: Soft Blocks Tutorial")
I love precuts. They’re like getting a selection of chocolates, each one tasty on it’s own, but together – a celebration of sweets! And, unlike eating all those chocolates, precuts don’t have a single calorie in them. Obviously, precuts are more expensive per-yard, but I wouldn’t buy that many yards of fabric… Instead, I get a large selection of various fabrics and get to enjoy all of the patterns (and solids).
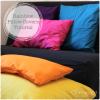
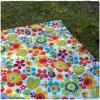
For this project I used a charm pack from the Moda Lollipop Collection (42 5” pieces), I got it from Fabric.com, but it’s been a while and I’m not sure if it’s still available.
You’ll need 36 pieces for making 6 blocks, but don’t throw away the scraps! We’ll be using them for part 2 of this project – a matching tag blanket. We’ll also use 4 more pieces for the back of the tag blanket, but that’s not strictly necessary, you can use other fabric if you like (I often use minky).
 - Part 1: Soft Blocks Tutorial | Moda Lollipops Charm Pack")
Aren’t those colors great?
So, let’s get started!
Materials & Notions
- 36 7cm (2.75″) square pieces of various fabrics. If you’re using a charm pack – that’s 36 pieces + left over scraps.
- A small amount of interfacing (less then 1/4 yard/meter)
- Fiberfill stuffing
- Matching thread
- Standard sewing supplies (scissors, seam ripper, etc.)
Instructions
-
Choose your colors: Lay out your fabric pieces and arrange them in groups of 6. In the collection I used there were 6 color group, so I chose one of each color including one solid for each block. In addition, I made sure that there were no duplicate patterns (in a different color…) in the same block.
When you’re happy with your arrangement, label the pieces or take a photo. You will forget how it was.
-
Cut and prepare your pieces: For each block, cut 6 7cm (2.75″) squares of fabric, and 6 6.5cm (2.5″) squares of interfacing (36 of each total). We will be using 0.5cm (1/4″) seam allowances, so the interfacing is only slightly smaller than the fabric.
Iron the interfacing on to the fabric pieces. Try to center them, so you can use them as a guide for sewing later on.
 - Part 1: Soft Blocks Tutorial")
-
Assemble: Take all 6 block pieces. Place two fabric pieces together, right sides facing. Sew along one edge, with a 0.5cm (1/4″) seam allowance (or using the interfacing as your guide). Open and iron seams flat. Continue attaching 2 more pieces the same way.When you reach the 5th and 6th piece, you will be attaching them to one of the middle pieces, making a cross shape (see image).
-
Build: At this point, we will start making the block 3 dimensional. Fold over the cross diagonally (see diagonal line on piece 3 in image), so that piece 4 and piece 5 are on top of each other (right sides facing). Sew piece 4 &5 together on one side (marked with the same color in image). Repeat for pieces 4 &6, 6 &2, and 5 & 2
.Now it gets a bit tricky… Making sure not to catch any of the other pieces when you sew, fold and line up one side of piece 1 with the top of piece 5. Sew together. Repeat with piece 1 & 6.
Stuff.
Hand sew shut.
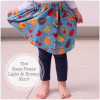
That’s my daughter enjoying hers…
 - Part 1: Soft Blocks Tutorial")
 - Part 1: Soft Blocks Tutorial")
Enjoy!
[This tutorial is free for commercial use. Please read the Terms & Conditions for further details.]


[…] a few from scrap fabric I had lying around before realizing I had lovely scraps left over from the soft baby blocks I shared with you last post, and that this would be a perfect use for them. So, here we […]
[…] a few from scrap fabric I had lying around before realizing I had lovely scraps left over from the soft baby blocks I shared with you last post, and that this would be a perfect use for […]