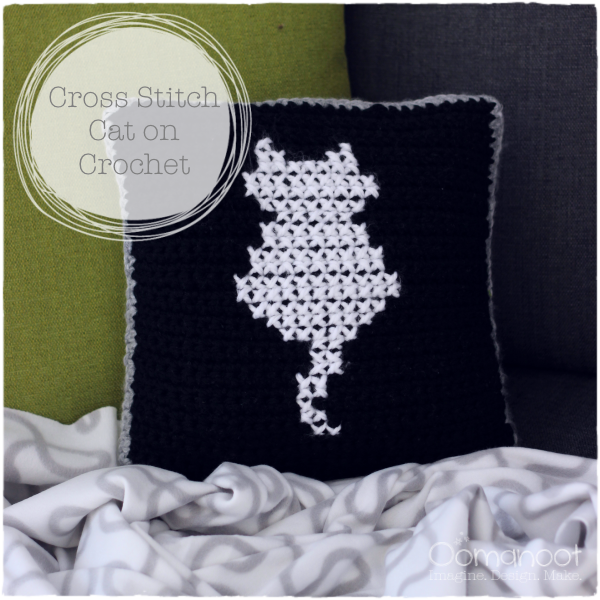
The thing about crochet, as opposed to knit, is getting a nice clear straight pattern is pretty near impossible, since the stitches form diagonal lines. This can be a good thing, sometimes, but when you’re trying to make a cat, well. That’s just not going to work.
However, there is an easy workaround. By crocheting a simple back and forth panel of single crochet, you can create a canvas for a cross stitch image of your choice. This can be done with any weight of yarn and made to any size, using any cross stitch pattern. I’ve included instructions for the cat pillow, but you could also cross stitch a hot air balloon, if you like. Just make sure that you’ve made enough stitches/rows to fit the number of stitches required by the cross stitch pattern.

Materials
- 9mm hook
- 1 skein bulky white yarn
- 1 skein bulky black yarn
- about 1/3 1 skein bulky gray yarn (CC2)
- each skein is 100g or ~110 meters (~120 yards)
- blunt needle for cross stitching and weaving in loose ends
- Fiber fill or a small pillow insert.
Notes
- Finished measurements: 12.5” X 12.5” (32 cm square)
- Gauge: 10 st X 9 rows make a 4” square.
- Gauge is not critical for this project, use thicker yarn to get a larger result or lighter yarn for a smaller result.
Abbreviations
- ch – chain
- sc – single crochet
- st – stitch
- [ … ] – repeat instructions in [ ] as many times as specified.
Instructions
Pillow Panel (make 2)
First panel is made with a white background, the second panel is make with a black background. This will be the main color (MC). The cross stitch pattern will then be worked in a contrast color (black on white, white on black – CC).
1: With MC, ch 32. sc in 2nd chain from hook. sc to end. ch 1, turn. (30)
2-34: sc in next st, sc to end. ch 1, turn.(30) Bind off.
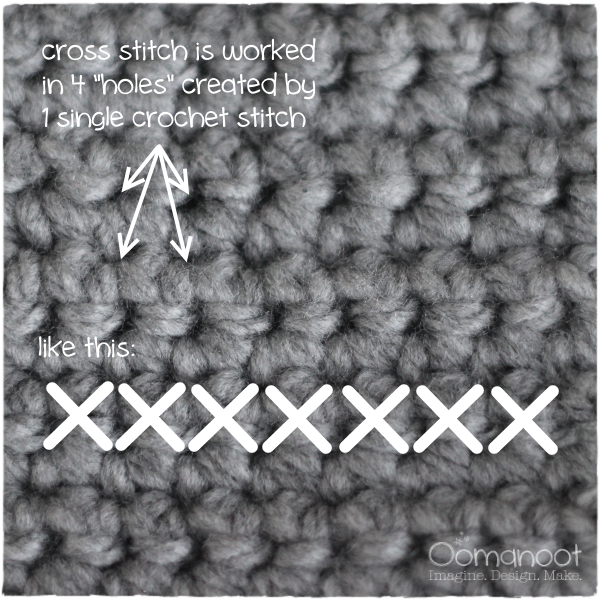
With CC, cross stitch the cat pattern on to the pillow panel. The cross stitch is worked in the holes at each of the 4 corners created by each single crochet (see image).
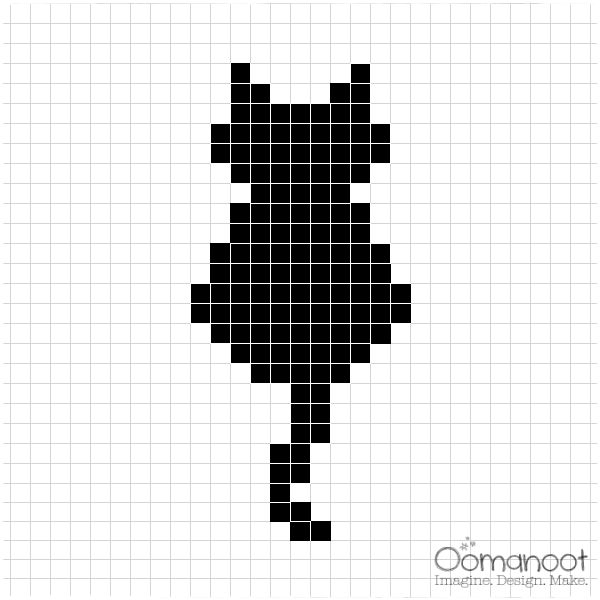
Start with left ear, at the 13th stitch from the left, 5th stitch from the top.
Assemble
Place both panels together, wrong sides facing. With CC2, sc evenly through both panels around 3 sides. Stuff firmly, continue sc along 4th side to close the pillow.

Enjoy!
[This tutorial is free for commercial use. Please read the Terms & Conditions for further details.]










Thankyou for a rare opportunity to see really a well-researched material.
I really don’t often come across such articles. The last one was probably the sole at https://www.resellerratings.com/store/Essaypro_com. And
the way you have structures the written text is
brilliant. Indeedthis can be a good read worth recommending.
Thanks.
Hello admin, i must say you have high quality articles here.
Your page can go viral. You need initial traffic only.
How to get it? Search for: Mertiso’s tips go viral