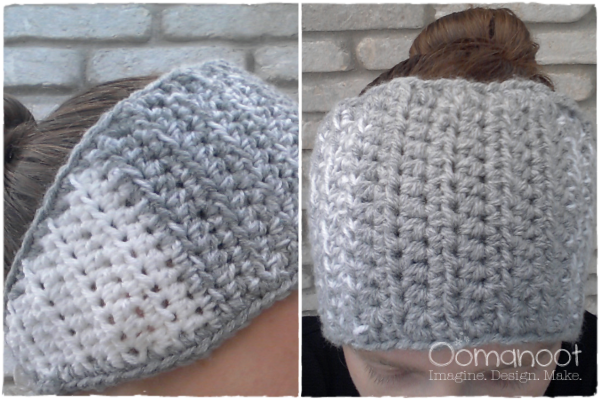
Every year I make everyone winter hats. This year I made a giant load of hats for charity. But no hat for me… This year’s been exceptionally cold, and my ears are freezing off! My hair is finally long enough to wear up, but that’s not really convenient for a hat. So instead, I decided to make an ear warmer.
I wanted it to be fast (as always) and warm, which I would normally do with bulky yarn, but my stash is severly depleted (yey! an excuse to go buy more yarn!) and I did not want to go out in the pouring cold rain to buy more. Instead, I decided to make it with 2 strands of worsted weight yarn crocheted together, and get a nice wintery ombre effect while I was at it.
So lets get our hooks crocheting and our ears warm!
Materials
- 6-7 mm crochet hook
- 2 balls grey (MC) and 2 balls white (CC) worsted weight yarn. You will not use up anywhere near an entire skein, I used leftovers and I estimate the total amount (for both balls) at about 1/4 of a ball (approx. 30-40 meters total).
- 1 large button
- A blunt needle
Notes
- The entire ear warmer is made with 2 strands of yarn held together as if they were one strand.
- To create the ombre effect, we will drop one strand of yarn and join another strand of yarn at each color switch.
- At each color switch, cut dropped strand leaving a tail approx. 6 cm/3″ long. While working the next row, crochet over joined strand tail and dropped strand tail instead of leaving them for weaving in later.
- Turning chain does not count as a stitch.
- Gauge: 9 rows X 11 st in hdc = 10 cm / 4” square.
Excuse the selfie, I wanted to show what it looked like when someone was wearing it and couldn’t find a model (or, in fact, time) to take really good pictures.

Abbreviations
- ch – chain
- sc – single crochet
- hdc – half double crochet
- st – stitch
- hdc 2tog – hdc crochet 2 stitches together: Yarn over. Insert hook in next stitch, yarn over and pull up loop (3 loops on hook). Yarn over. Insert hook in next stitch, yarn over and pull up loop (5 loops on hook), yarn over and draw through all 5 loops on hook – 1 stitch decreased.
- [ … ] – repeat instructions in [ ] as many times as specified.
Instructions
Row 1: With 2 strands CC, ch 6. hdc in 3rd ch from hook. hdc in next 3 ch. (4)
Row 2: ch 2, turn, hdc in top of turn st. hdc in next 2 st. 2 hdc in last st. (5)
Row 3: ch 2, turn, hdc in top of turn st. hdc in next 3 st. 2 hdc in last st. (6)
Row 4: ch 2, turn, hdc in top of turn st. hdc in next 4 st. 2 hdc in last st. (7)
Row 5: ch 2, turn, hdc in top of turn st. hdc in next 5 st. 2 hdc in last st. (8)
Row 6: ch 2, turn, hdc in top of turn st. hdc in next 6 st. 2 hdc in last st. (9)
Row 7: ch 2, turn, hdc in top of turn st. hdc in next 7 st. 2 hdc in last st. (10)
Row 8: ch 2, turn, hdc in top of turn st. hdc in next 8 st. 2 hdc in last st. (11)
Row 9: ch 2, turn, hdc in top of turn st. hdc in next 9 st. 2 hdc in last st. (12)
Drop 1 strand CC and join 1 strand MC (1 strand CC, 1 strand MC).
Row 10: ch 2, turn, hdc in top of turn st. hdc next 11 st. (12)
Row 11-18: repeat row 10.
Drop 1 strand CC and join 1 strand MC (2 strand MC).
Row 19-27: repeat row 10.
Drop 1 strand MC and join 1 strand CC (1 strand CC, 1 strand MC).
Row 28-36: repeat row 10.
Drop 1 strand MC and join 1 strand CC (2 strands CC).
Row 37: ch 2, turn, hdc in top of turn st. hdc next 9 st, hdc 2tog in last 2 st. (11)
Row 38: ch 2, turn, hdc in top of turn st. hdc next 9 st, hdc 2tog in last 2 st. (10)
Row 39: ch 2, turn, hdc in top of turn st. hdc next 9 st, hdc 2tog in last 2 st. (9)
Row 40: ch 2, turn, hdc in top of turn st. hdc next 9 st, hdc 2tog in last 2 st. (8)
Row 41: ch 2, turn, hdc in top of turn st. hdc next 9 st, hdc 2tog in last 2 st. (7)
Row 42: ch 2, turn, hdc in top of turn st. hdc next 9 st, hdc 2tog in last 2 st. (6)
Row 43: ch 2, turn, hdc in top of turn st. hdc next 9 st, hdc 2tog in last 2 st. (5)
Row 44: ch 2, turn, hdc in top of turn st. hdc next 9 st, hdc 2tog in last 2 st. (4)
Bind off.
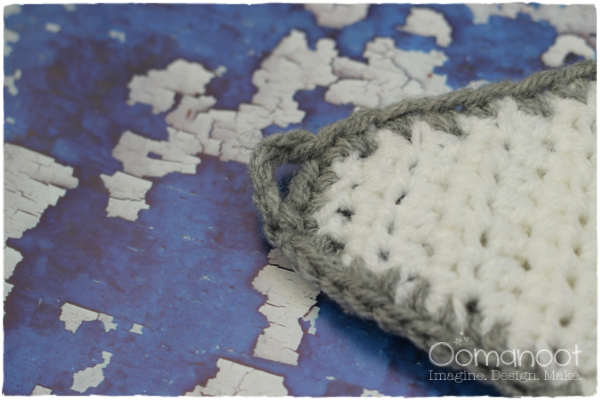
With 2 strands MC, sc evenly around the entire ear warmer starting at one corner. When you finish the round, ch 6 and join at the opposite corner (of the same end…) to create a button loop.
Sew button on the other end.


Keep your ears warm & enjoy!
[This tutorial is free for commercial use. Please read the Terms & Conditions for further details.]


